What To Look for In Young Warmblood Jumpers

Are you in the market for a strong, kind, and competitive young jumper, but don’t exactly know what to look for? Well then, this is what we look for when buying promising young jumpers. To make things easier on ourselves (and you!) we have broken down what we look for into a few different groups.
Conformation and Pedigree
Is this horse bred to jump?
Research the pedigree, are the dam/sire known to be rideable? Scopey? Fast? Does this type of breeding suit you and your goals/capabilities?
Is the horse built strong, and correct?
When looking to determine if the prospect is strong and healthy, we look for a few major things. Does the prospect have straight legs with an uphill build? (Remember, many young horses 0-4 will be downhill at times due to growth). Square hip? Large joints and bones? Healthy hooves? Remember to constantly ask yourself, “does this horse’s potential align with my goals and intent in the future?”
Natural Ability
How does the horse free jump and lunge – or go under saddle if broken?
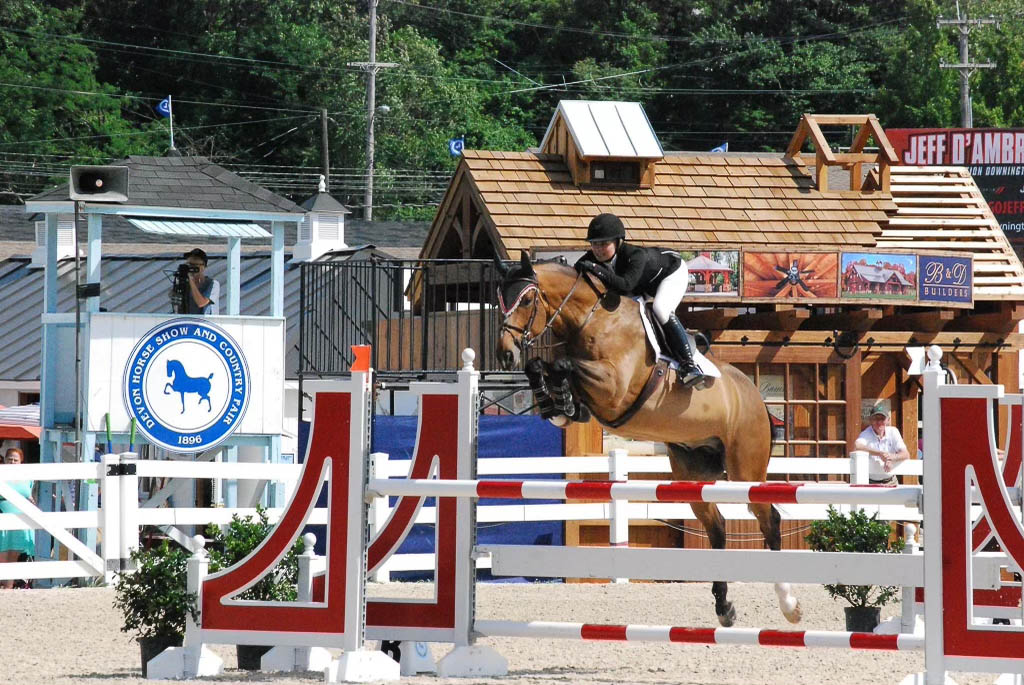
Watching your prospect go through a jump chute can be one of the best ways to tell if you’re looking at a good horse. Pay attention to the horse’s demeanor – are they brave, or pensive? Do they seem natural over the jumps, or do they seem labored by the idea? Look for proper jump technique, and a capable hind end – tight knees, quality bascule?
Movement
How does the horse carry itself?
When determining whether a prospect is going to be capable of a competitive jumper career, we look for 4 major characteristics.
- Does the horse have an elastic stride?
- Is their step even from left to, right?
- Do they track up?
- Do they demonstrate balance?
If all answers are “Yes” that is a good sign you are looking at a capable horse.
Pre-Purchase Exam
Vision, lungs, heart
Be sure to lunge the horse, paying extra attention to their feet. (No dragging toes!)
Make sure the horse can hold the canter lead both ways. (If a 0-3yo and lead is not held, is this a veterinary issue, or a training and strength issue? Discuss with your vet.)
Radiographs of legs, back, and neck are now becoming more common. (Remember, horses do not have perfect radiographs, it is up to you and your vet to determine what you can live with and manage.)
Questions for your vet:
1. When can a minor flaw become a major issue, if ever?
2. What does this horse’s maintenance look like? (Remember, Sport and High-level Jumpers require regular veterinary checkups)
3. Will the horse hold up to the physical stress of the level of competition you desire?

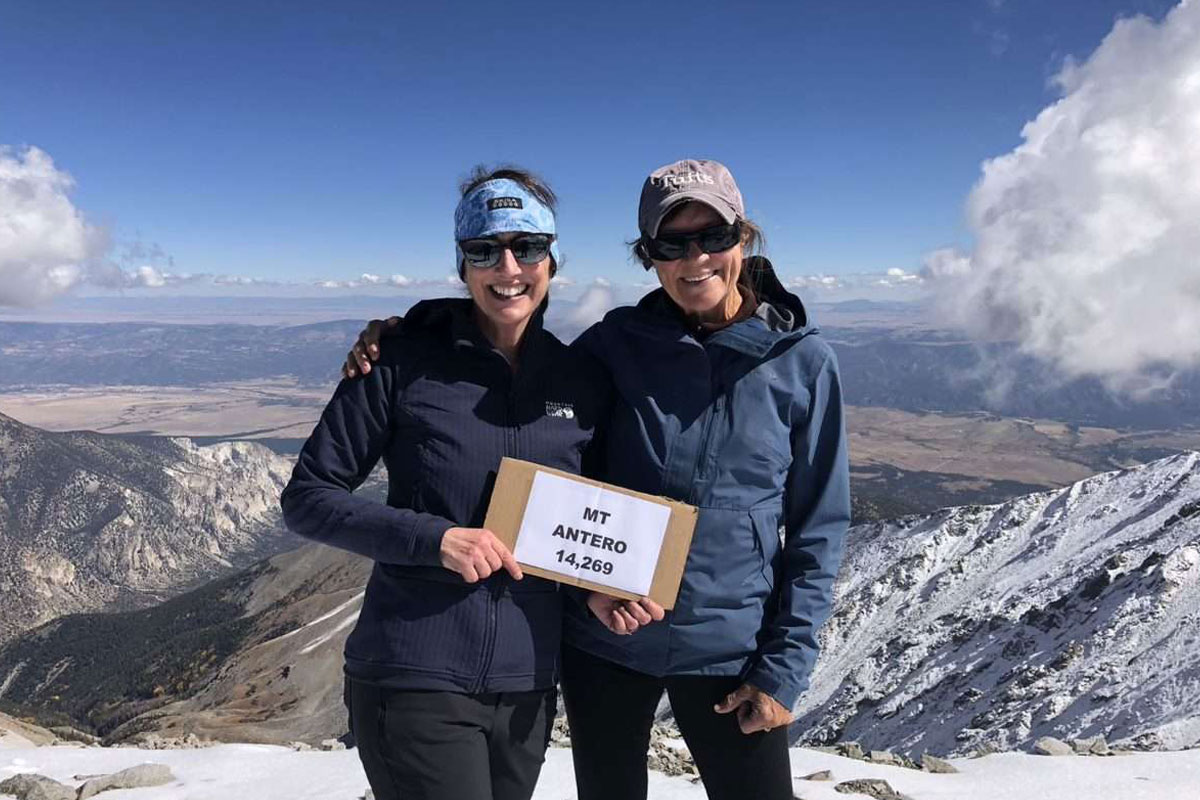
For me, hiking and climbing the summits of Colorado’s tallest peaks is a spiritual, physical & mental journey. I gain experience and learn something with each climb. Here are my first 19 lessons as a NEWBIE:
- Go with someone you like, respect and enjoy. It will most likely be a long day and it’s important there is mutual respect and understanding about the risks you will and won’t take to summit. However, you should be 100% prepared with all the tools you need to manage a successful experience on your own. Do not rely on anyone else but yourself. You need to be 100% responsible for your safety.
- Make sure you eat a complex carbohydrate meal the night before. Fueling your body is critically important. At the beginning of the hike, be sure you snack- even if you are not hungry. BelVita crackers are good sources of long-lasting energy and help me power through. Honey Stingers also work for my body. I keep both snacks within easy reach to be able to eat on the move.
- Lay out all your gear the night before. Get an early start. Earlier than you want.
- Bring more water than you think you need. 2 – 3 liters is what I bring. Running out of water is dangerous. I also pack a Katadyn filter in my backpack so if there is a river I can fill up in an emergency.
- Use COTREX, bring a battery pack for your phone and print out two copies of summit directions/instructions. Keep one set in your backpack in a ziplock bag for emergencies. Directions can easily get wet or blown away in a gust.
- Make sure all your devices are charged completely. Bring Battery packs/ portable chargers.
- Purchase a Garmin INREACH. How much is your life worth? The INREACH uses satellite GPS and messaging, and you can send a SOS. You can set up your INREACH to send tracking updates to your contacts in regular intervals so that your family/friends have peace of mind. And if there is ever the need for a rescue it will be easier to locate you. You won’t always have a cell signal with your phone. In extreme cold weather your phone will die. Get an INREACH.
- Let someone know your plans. What Trailhead will you park your car/truck, what summit you plan to hike, and what is your expected time back. Use your INREACH to waypoint your parked car.
- Wear sunblock year-round. Worst sunburn I got was a winter hike up Mount Yale. Make sure your lip balm has sunblock in it. Be sure you reapply. Pay careful attention to your ears, under your nose and lips.
- Take breaks when you need to. Listen to your body. It isn’t a race.
- Be prepared to spend the night on the mountain. If there is a problem, rescues take time. Pack a BIVY, handwarmers, windbreaker, extra clothes, extra food and medical supplies. Pack extra gloves too.
- Winter climbing -don’t take chances. Pay attention to the slope degree and CAIC- Colorado Avalanche Information Center forecasts & warnings. Buy a BCA Tracker3. Get it synched with your team members. Carry a shovel and ice ax. In a pinch you can use your snowshoe as a shovel. Be safe, and smart. The mountain will be there another day, don’t take chances.
- Summer climbing, bring bug spray and a hoodie to protect the back of your neck and keep off bugs. The pullovers that have SPF are great!
- Tell your climbing partners if you feel dizzy and/or disoriented.
- Figure out ahead of time what to pack in your backpack to help you walk out on your own in the case of a minor injury (sprain, twist, fall). Ankle brace, knee support? You need to be self-sufficient.
- Agree on a turnaround time and make sure you turn around. You don’t want to get caught above tree line in a dangerous afternoon storm or attempt to climb down in the dark.
- Check Mountain-forecast.com for weather and wind conditions. 50 MPH winds are miserable and dangerous. Why put yourself through that?
- Good gear is very important. Have the right gear for the climate. Spikes are very helpful almost all year long. I keep a pair in my pack for icy conditions. It can be icy and snow covered in July at elevation.
- Don’t take yourself too seriously. Know your limits. If the conditions are unsafe or you aren’t feeling yourself, turn around. Live to try another day.
I hope to be healthy and capable enough to summit all 58. Can’t wait to see what I learn & experience in year two!
Serves: 4 people
Ingredients:
- 4 ¼ cups all-purpose flour, plus more for hands
- 1 ½ teaspoons salt
- 1 ½ teaspoons baking soda
- 4 tablespoons unsalted butter melted
- 3 tablespoons honey
- 1 ¾ cups buttermilk, plus 1 tablespoon for brushing top of dough (optional) sprinkle 1 tablespoon whole oats on top of dough before baking
- Sprinkle Kosher salt on top of dough before baking (this I do)
Directions:
- Preheat oven to 400 degrees. Line a flat cooking sheet with Parchment paper
- Whisk the flour, salt & baking soda together in a large bowl. Set aside.
- Whisk the melted butter and honey together.
- Pour into the flour mixture in 2-3 additions, this will take time.
- Fold the buttermilk, with a spatula, to create a slightly moist dough.
- Turn dough onto a floured flat surface and any flour crumbs at the bottom to work surface.
- Using your hands with some flour on it, bring the dough together into a ball then flatten with your hand about 2” thick & 7-8” disc. This does not have to be accurate. This is rustic bread.
- Place on your cookie sheet. Score top of dough with a sharp knife, slicing thru 5-6 times.
- Place on your cookie sheet & sprinkle some oats & salt over the top.
- Bake for 45 minutes. Half way through baking cover the bread with aluminum foil to keep from browning too much. Cool bread at least 15 minutes before slicing. Bread keeps fresh for about 3 days.
We loved eating this with softened butter & extra honey on top!
Delish.
(This is a dense nutty flavor bread)
Serves: 6-8 people
Ingredients:
- 1 Tb Extra Virgin Olive Oil
- 2 Tbsp. Butter
- 1 Fresh Bay Leaf
- 2 Ribs Celery w/ Greens, finely chopped
- 1 medium yellow onion, finely chopped salt & pepper to taste
- 3 Tbsp. Flour
- 1 Tbsp. Poultry Seasoning or 2 tsps. Ground Thyme
- 2 Tbsp. Hot Sauce
- 6 Cups Chicken Stock or Broth
- 29oz Can Pumpkin Puree
- 2 Cups heavy Cream
- 1/2 tsp grated nutmeg
Relish:
- 1 green apple, chopped
- 1/4 red onion, finely chopped
- 2 Tbsp. Lemon Juice
- 1/2 Cup Dried Sweetened Cranberries, chopped
- 2 tsps. chili powder
- 2 tsps. sugar
- 1 tsp cinnamon
Directions: Heat a medium soup pot over medium to medium high heat. Add oil, butter, bay leaf, celery, onion, salt & pepper. Cook for 6-7 minutes, until tender. Add flour, poultry seasoning and hot sauce: cook for 1 minute.
Whisk in chicken stock and bring liquid to a bubble. Whisk in the pumpkin in large spoonful’s, incorporating it into the broth. Simmer for 10 minutes to thicken a bit. (can be made 2 days ahead to this point). Add cream and nutmeg. Lower heat; keep warm until ready to serve. While the soup simmers, combine all relish ingredients. Adjust seasonings in soup and relish to taste. Serve soup in bowls, with a few spoonfuls of relish on top.

Serves: 6 people
Ingredients:
- 2 tablespoons olive oil
- 3 1/2 pounds boneless beef chuck roast, cut into 2/ 1/2 inch pieces
- Fine sea salt and freshly ground pepper to taste
- 3 1/2 cups chopped yellow onions
- 1 cup Cabernet Sauvignon
- 1 (14-ounce) can dried tomatoes with Italian herbs
- 1/2 cup hoisin sauce
- 2 bay leaves
- 1 pound carrots, peeled and cut diagonally into 1 inch slices
- 2 tablespoons all-purpose flour
- 1 tablespoon butter, softened
- 2 tablespoons chopped fresh parsley
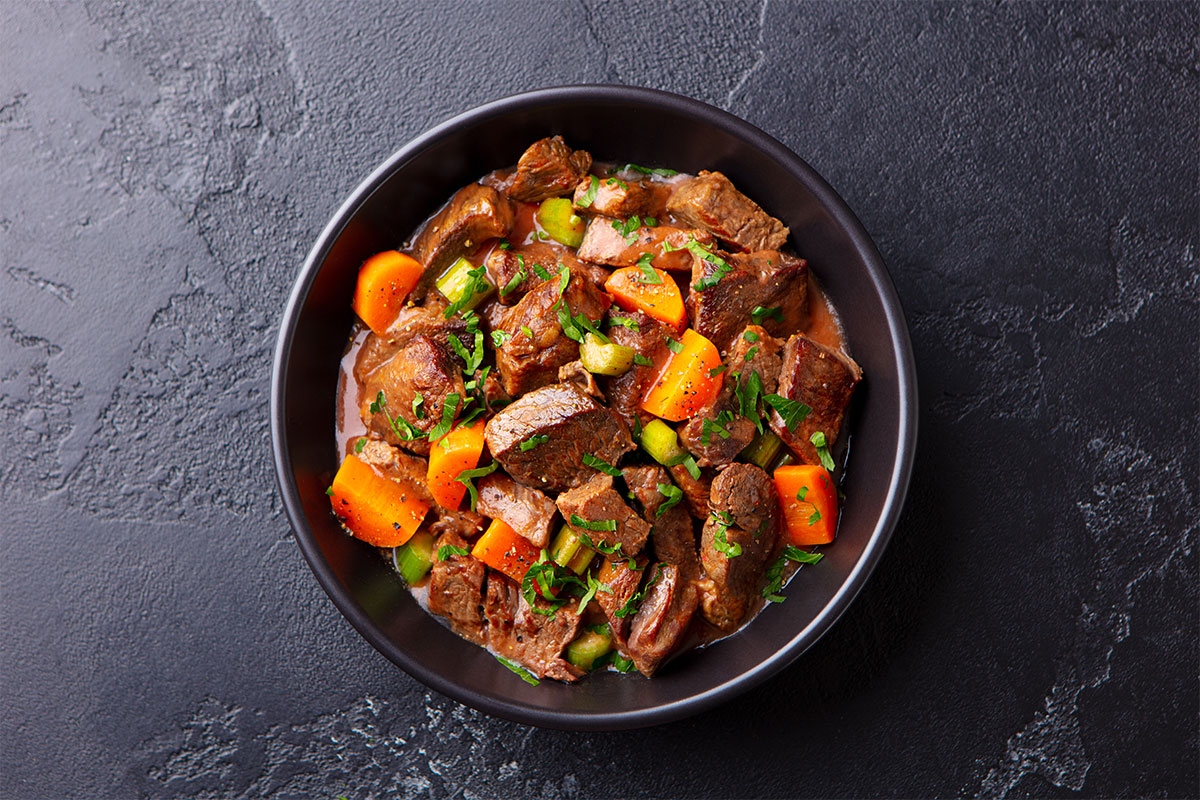
Directions: Heat 2 tablespoons of olive oil in a heavy stockpot over high heat. Season the beef with sea salt and pepper and add to the hot olive oil . Sauté for 10 minutes or until brown on all sides. Remove the beef to a warm platter with a slotted spoon.
Reduce the heat to medium and add 2 tablespoon olive oil to the stockpot. Add the onions and sauté for 15 minutes or until golden brown. Return the beef to the stockpot. Add 1 cup wine, undrained tomatoes, hoisin sauce, and bay leaves and bring to a rolling boil. Reduce the heat to low. Cover and simmer for 45 minutes, stirring occasionally.
Add the carrots and 1 cup of wine. Cover and simmer for 30 minutes. Uncover and increase the heat to high. Cook for 15 minutes or until slightly thickened, stirring occasionally. Do not boil. Reduce the heat to medium. Stir in a mixture of the flour and butter. Simmer for 8 minutes or until thickened. Discard the bay leaves. Adjust the seasonings to taste. Spring with Parsley.